
Omamox - Proxmox management
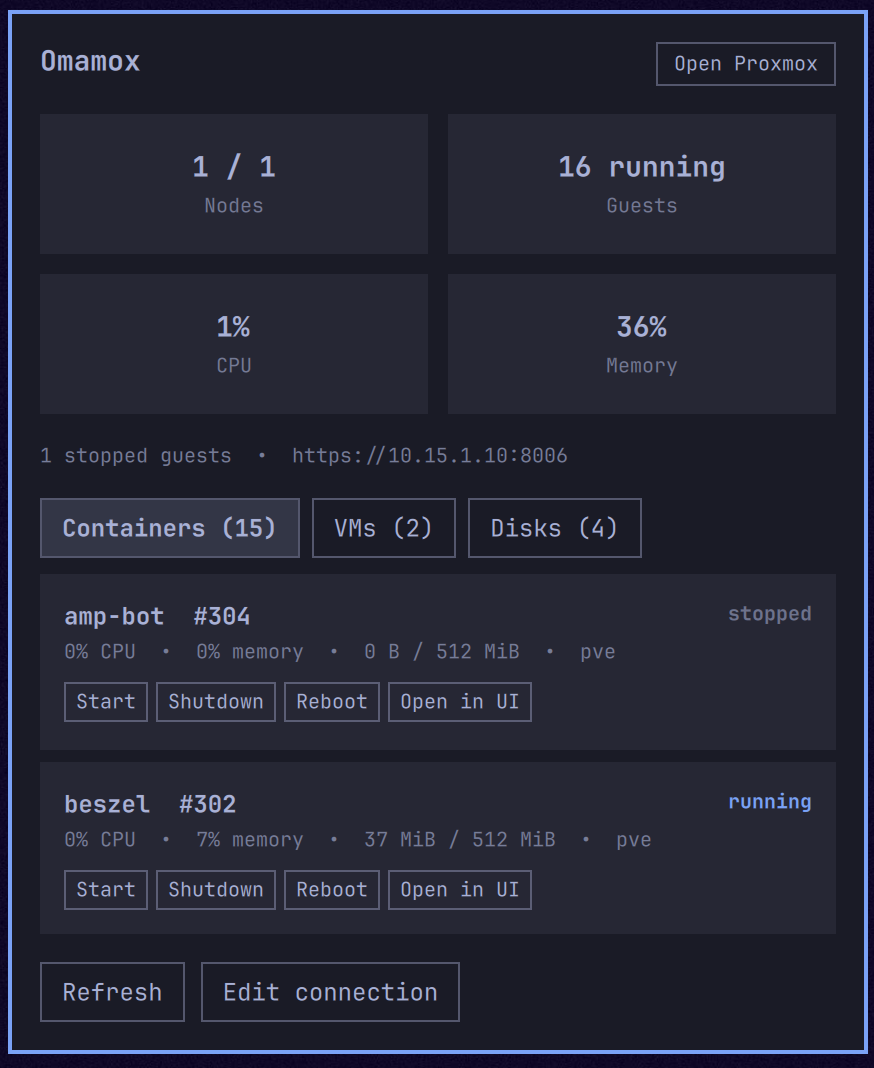
Proxmox management and status from the Omarchy bar. Monitor nodes, guests, and storage with quick power controls and web access.
Install
omarchy plugin add https://github.com/brandc87/omamox.git --enable
Optionally position the widget:
omarchy bar move io.github.brandc87.omamox --section right
Remove
omarchy plugin remove io.github.brandc87.omamox
Create the Proxmox API token
The recommended setup uses a dedicated user, a least-privilege role, and a privilege-separated token. Complete these steps in the Proxmox web interface as an administrator.
1. Create a role
Open Datacenter → Permissions → Roles, select Create, and name the role
Omamox.
| Privilege | Purpose |
|---|---|
Sys.Audit |
Read node status and utilisation |
VM.Audit |
Read VM and container status |
Datastore.Audit |
Read storage status and usage |
VM.PowerMgmt |
Start, shut down, and reboot guests |
For monitoring only, omit VM.PowerMgmt. The dashboard will work, but
Proxmox will reject power actions.
2. Create a dedicated user
Open Datacenter → Permissions → Users, select Add, and create
omamox@pve. Do not reuse an administrator account.
3. Assign the role to the user
Open Datacenter → Permissions, select Add → User Permission, and set:
- Path:
/ - User:
omamox@pve - Role:
Omamox - Propagate: enabled
Using / lets Omamox display all resources covered by the role. For a
restricted setup, assign the role only to the required resource paths.
4. Create the API token
Open Datacenter → Permissions → API Tokens, select Add, and set:
- User:
omamox@pve - Token ID:
omamox - Privilege Separation: enabled
- Expire: set an appropriate date, or manage rotation manually
Proxmox displays the token secret only once. Copy it immediately and store it securely. If lost, delete the token and create a replacement.
5. Assign the role to the token
Because privilege separation is enabled, the token needs its own ACL. Open Datacenter → Permissions, select Add → API Token Permission, and set:
- Path:
/ - API Token:
omamox@pve!omamox - Role:
Omamox - Propagate: enabled
Both assignments are required. A privilege-separated token receives the intersection of its own ACL and its owning user's ACL.
6. Build the Omamox API key
Combine the token identifier and secret:
omamox@pve!omamox=TOKEN_SECRET
Enter the complete value, including ! and =—not only the secret.
Connect Omamox
Click the Omamox bar icon and enter:
- URL: normally
https://hostname-or-ip:8006 - API key: the complete value created above
- Allow insecure TLS: enable only for a self-signed or untrusted certificate
Select Save and connect. Omamox stores the connection in
~/.config/omamox/.env, with file mode 0600 and directory mode 0700.
Manual configuration
API_KEY=omamox@pve!omamox=TOKEN_SECRET
URL_BASE=https://proxmox.example:8006
ALLOW_INSECURE=false
chmod 700 ~/.config/omamox
chmod 600 ~/.config/omamox/.env
omarchy restart shell
TLS certificates
Certificate verification is enabled by default and strongly recommended. Install a certificate trusted by the Omarchy machine whenever possible.
For a self-signed certificate, enable Allow insecure TLS or set
ALLOW_INSECURE=true. This disables certificate and hostname verification
for Omamox API requests; use it only on a trusted network. It does not permit
plain HTTP: API requests and credentials are always sent over HTTPS.
Usage
- Left-click the icon to open or close the panel.
- Middle-click it to refresh immediately.
- Open Proxmox opens the cluster web interface.
- Containers, VMs, and Disks filter the resource list.
- Start, Shutdown, and Reboot control a guest. Shutdown and Reboot require confirmation.
- Open in UI opens the selected guest in Proxmox.
- Edit connection changes the host, token, or TLS setting.
The service refreshes every 30 seconds and whenever the panel opens. Change the interval in widget settings or run:
omarchy bar set io.github.brandc87.omamox refreshIntervalSec 60
The supported interval is 5–3600 seconds.
Troubleshooting
401 Unauthorized
- Confirm the API key contains the full token identifier and secret.
- Check that the token has not expired or been deleted.
- Create a replacement if the secret was lost; Proxmox cannot reveal it again.
403 Permission check failed
- Assign
Omamoxto bothomamox@pveandomamox@pve!omamoxat the intended path. - Enable Propagate when assigning at
/. - Add
VM.PowerMgmtif monitoring works but power actions fail.
Certificate verification failed
Install a trusted certificate, add the issuing CA to Omarchy, or enable Allow insecure TLS on a trusted private network.
The panel is empty
- Confirm the Omarchy machine can reach port
8006on the Proxmox host. - Include
https://and the correct port in the URL. - Confirm the role has
Sys.Audit,VM.Audit, andDatastore.Audit. - Click Refresh after correcting permissions.
Plugin changes do not appear
omarchy plugin validate ~/.config/omarchy/plugins/io.github.brandc87.omamox
omarchy restart shell
Security notes
- Use a dedicated user and token.
- Grant only the resource paths Omamox needs.
- Omit
VM.PowerMgmtfor a read-only dashboard. - Set an expiry date and rotate the token periodically.
- Never commit
~/.config/omamox/.envor paste the token into logs or issues. - Prefer valid TLS certificates over
ALLOW_INSECURE=true.
Architecture
Panel.qmlowns the bar button and interface.Service.qmlowns configuration, polling, API actions, timers, and state.Model.jsparses configuration and Proxmox responses.OmamoxIcon.qmlprovides the theme-aware icon.
API requests use Quickshell.Io.Process; the token is supplied to curl over
stdin rather than exposed in process arguments.
Development
omarchy plugin validate ~/.config/omarchy/plugins/io.github.brandc87.omamox
Upstream documentation: