
Syncshell shows Syncthing activity in the Omarchy bar, manages local folders and opens a redesigned Web UI. Versions >= 0.1.8 use a bundled Go core since other Linux shell adapters are planned.
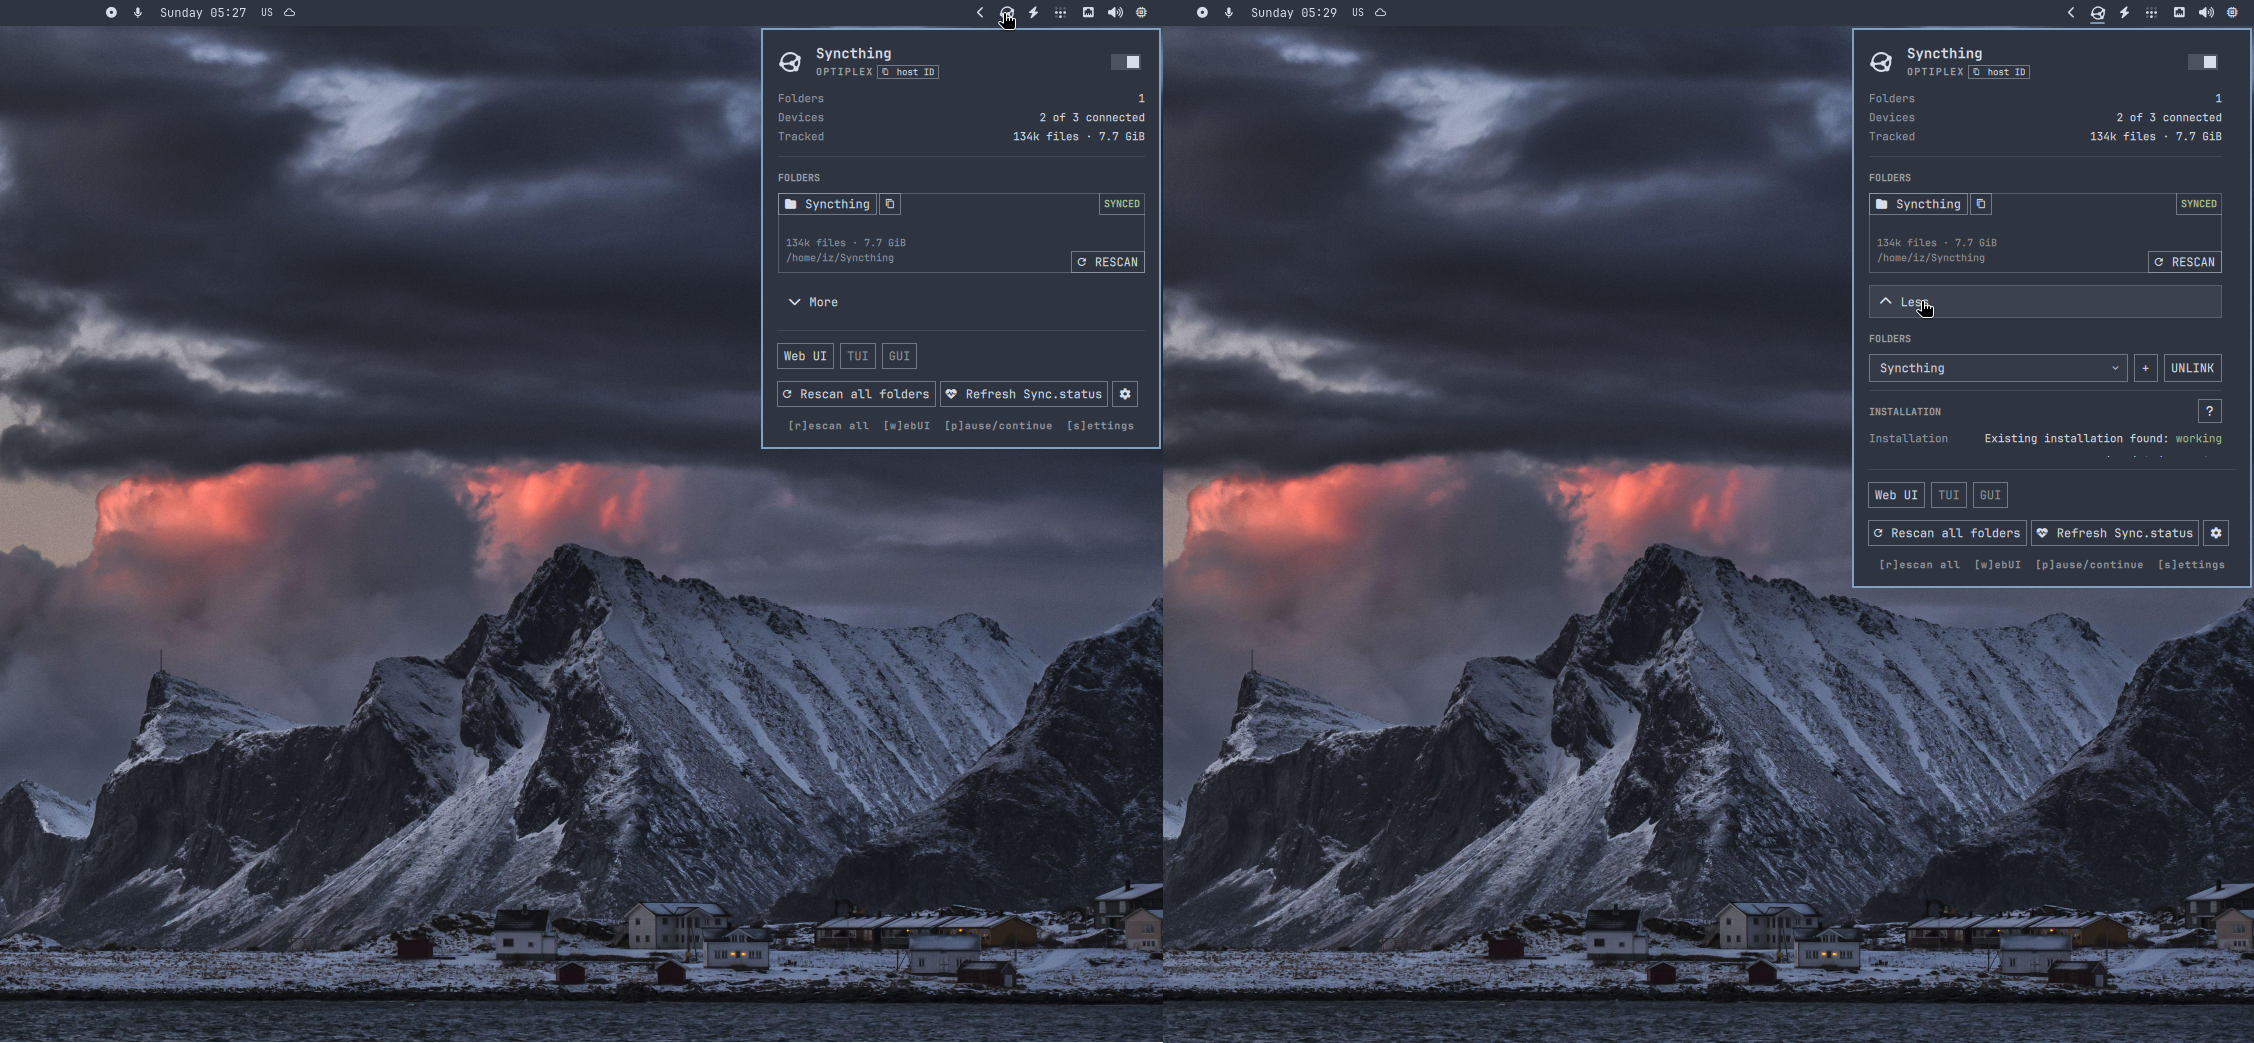
Quick start
- select the switch/toggle in the top right to start or stop the user service
- the folder icon in the top-left of the folder card opens its directory
- expand More, then
- FOLDERS section:
- select + to configure a local directory
- share icon: choose which configured devices share this folder
- unlink icon: pause synchronization for this folder; keep its configuration and files
- REMOTE DEVICES section: add a device / manage its shared folders
- FOLDERS section:
- select RESCAN on a folder or Rescan all folders for linked folders
- select Web UI for advanced Syncthing options
- select the gear or press
sfor appearance settings and clean removal
One or two folders appear as cards; larger collections use a searchable selector; unshared and paused folders are included.
Install
omarchy plugin add https://github.com/omarchy-QOL/syncshell.git --enable
Open the widget and expand More. If Syncthing is missing, select Install
Syncthing to install the package and start the user service. On Omarchy, this
uses omarchy pkg add, the same mechanism that manual package installation
would normally use. Existing installations are detected automatically.
If UFW is enabled, run sudo ufw allow syncthing to allow device discovery and
synchronization.
The released plugin supports Omarchy on Linux x86_64. Alpha adapters for DankMaterialShell, Illogical Impulse, Caelestia, and Waybar are under development; they are not officially part of the release yet, but can be tested via manual installation on those systems. ARM and daemon mode remain future work.
Demo videos
Click a preview to play the video. These four walkthroughs cover live file activity, folder management, Web UI theming, and plugin settings.
<!-- prettier-ignore --><table> <tr> <td width="50%" valign="top"> <a href="https://omarchy-qol.github.io/syncshell/assets/published/01_syncthing_file_activity.mp4" > <img src="assets/published/01_syncthing_file_activity.png" alt="File activity and synchronization" > </a> <p><strong>File activity</strong></p> <p> Copy and remove files while the panel reports live synchronization activity. </p> </td> <td width="50%" valign="top"> <a href="https://omarchy-qol.github.io/syncshell/assets/published/02_syncthing_folder_lifecycle.mp4" > <img src="assets/published/02_syncthing_folder_lifecycle.png" alt="Unlink, link, and forget a folder" > </a> <p><strong>Folder lifecycle</strong></p> <p> Unlink, relink, and forget a folder without deleting its local files. </p> </td> </tr> <tr> <td width="50%" valign="top"> <a href="https://omarchy-qol.github.io/syncshell/assets/published/03_syncthing_theme_aware_webUI.mp4" > <img src="assets/published/03_syncthing_theme_aware_webUI.png" alt="Theme-aware Syncthing Web UI" > </a> <p><strong>Theme-aware Web UI</strong></p> <p> Follow Omarchy theme changes in Syncthing's Web UI without reloading. </p> </td> <td width="50%" valign="top"> <a href="https://omarchy-qol.github.io/syncshell/assets/published/04_syncthing_icon_change_and_other_settings.mp4" > <img src="assets/published/04_syncthing_icon_change_and_other_settings.png" alt="Syncthing icon and plugin settings" > </a> <p><strong>Icon and settings</strong></p> <p> Switch the bar icon style and review the plugin's other settings. </p> </td> </tr> </table>[!WARNING] The Hyprland window to the left of the plugin is not part of the plugin. It live-tracks changes in the
test-sourcedirectory for the demonstration.
File activity
The plugin reports only state exposed by Syncthing:
- Blue identifies synchronization or an indexed addition.
- Red identifies an indexed entry with
deleted=true. - Green identifies remote download progress, which is an upload from this device.
Syncthing does not expose a reliable source-to-destination relationship for a rename or move, so the plugin does not guess one from nearby additions and deletions.
Keybindings
Also shown in the panel footer.
| Key | Action |
|---|---|
r |
rescan all folders |
w |
open the Web UI |
p |
start or stop the service |
s |
open plugin settings |
q/esc |
close the panel |
Settings
Settings opens ~/.config/omarchy/ilyazar.syncthing/settings.toml in your
editor. Saves are validated; invalid edits show an error and leave the session's
last valid settings active.
Older settings offer Auto-port, Manual port and Cancel. Auto-port
previews the migration to schema 2, preserves valid preferences and comments,
and keeps an exact backup beside the original. Unrecognized or invalid settings
need manual correction.
style.icon_style = "themed"follows the bar foreground. Use"branded"for the classic Syncthing icon.style.web_ui_theme = "default"uses Syncthing's own Web UI.style.web_ui_theme = "modern"uses the bundled Syncshell Web UI.style.web_ui_theme = "omarchy"applies the Omarchy palette to that same UI. This is the default.
Omarchy theme changes apply live. Reload the page when switching Web UI
profiles; modern keeps its own appearance.
New Web UI
The bundled UI keeps Syncthing's API and adds a few changes over the classical interface:
- Clearer layout: folders, this device and remote devices sit alongside each other on wide screens and stack on smaller ones. Current activity stays visible; configuration and identification details fold away. Compact counts and icon tooltips keep the cards readable.
- Resolve sync conflicts (beta): the second tab lists conflict files from Syncthing's index, with folder and global rechecks. File links open the containing folder in your default file manager. Autoresolve restores a conflict file's original name when that name is absent, preserving contents.
- Notifications: a separate tab shows pending messages. Its dot follows the highest severity and disappears when all messages are resolved.
- Smaller frontend: The low-overhead and minimalist Preact replaces AngularJS, whose support ended in 2022 and removes most of the old JavaScript widget libraries.
Compared with the default Web UI shipped with Syncthing v2.1.3:
| Measure | Syncthing v2.1.3 | Syncshell | Reduction |
|---|---|---|---|
| Application source (LOC) | 8,296 | 4,299 | 48% |
| Readable source + vendor (LOC) | 53,096 | 9,885 | 81% |
| HTML/CSS/JS assets | 2.79 MB | 0.33 MB | 88% |
| Whole Web UI assets | 6.58 MB | 0.48 MB | 93% |
Three Syncshell views in Nord, followed by Syncthing's default UI. The file review is in beta, but should work more or less.
<table> <tr> <td width="50%" valign="top"> <h4>Overview (Nord theme)</h4> <a href="assets/webui-nord-overview.png"> <img src="assets/webui-nord-overview.png" width="100%" alt="Syncshell folders and devices in three columns under Nord"> </a> </td> <td width="50%" valign="top"> <h4>Notifications (Nord theme)</h4> <a href="assets/webui-nord-notifications.png"> <img src="assets/webui-nord-notifications.png" width="100%" alt="Syncshell notifications in their own tab under Nord"> </a> </td> </tr> <tr> <td width="50%" valign="top"> <h4>Conflict review (Nord theme)</h4> <a href="assets/webui-nord-conflicts.png"> <img src="assets/webui-nord-conflicts.png" width="100%" alt="Example current and conflict files with recheck and rename actions"> </a> </td> <td width="50%" valign="top"> <h4>Default Syncthing UI</h4> <a href="assets/webui-syncthing-default.png"> <img src="assets/webui-syncthing-default.png" width="100%" alt="Syncthing's original layout with expanded folder details"> </a> </td> </tr> </table>Open the UI through the plugin's Web UI button to enable local file opening and renaming. These actions require Syncthing and the desktop to run as the same user. Containers, tunnels, relative paths and symlinked paths are unsupported for file actions; permission errors leave files unchanged. Discovery and rechecks remain available without desktop access. Reopen through the plugin after its core restarts.
Tested with Syncthing v2.1.3. Source history and licensing details are recorded in Syncshell Web provenance.
Manage folders and devices from the panel
- UNLINK / LINK pause and resume a folder; they do not change its path or sharing.
- FORGET removes an unlinked folder from Syncthing's configuration while keeping its files.
- Add requires a unique Folder ID. Missing directories can be created after confirmation. Overlapping paths are rejected. Select remote devices explicitly to share the folder.
- Use FOLDERS to choose a folder's devices or review and remove the selected device's existing shares.
Incoming unencrypted folder offers can prefill the setup form. Use the Web UI for encrypted sharing, untrusted devices and details beyond the panel's limits. Shared folders need the same Folder ID on each device; accept an offer rather than create a separate identity. See Syncthing's folder guide.
Roadmap and prior releases
See CHANGELOG.md for details.
| Release | Date | What changed |
|---|---|---|
| 0.1.9 | 2026-09-21 | add remote-device setup and folder-sharing controls |
| confirm directory creation and folder/device removal | ||
| fix remote counts and keep rescan controls consistent | ||
| refine dropdowns, status, and installation feedback | ||
| allow plugin removal while Syncthing is unavailable | ||
| Future | TBD | mature alpha DMS, II, Caelestia, and Waybar adapters |
| 0.1.8 | 2026-09-13 | use one native core for the Omarchy panel |
| support healthy externally managed Syncthing instances | ||
| add the Preact Web UI and settings migration | ||
| add conflict review (beta) and guarded file renaming | ||
| improve error details, rescan feedback and recovery | ||
| fix themed icon contrast, scaling and Web UI branding | ||
| 0.1.7 | 2026-08-31 | fix persistent service-state reconciliation |
| UI/UX: clear semantics on buttons, harmonize font size | ||
| 0.1.6 | 2026-08-22 | make live and indexed file activity accurate |
| refine folder lifecycle controls and pending offers | ||
| add versioned icon and live Web UI theme settings | ||
| refresh the preview and add four focused demo videos | ||
| 0.1.5 | 2026-08-20 | add an optional theme-colored bar icon |
| 0.1.4 | 2026-08-16 | support TLS-enabled local Syncthing APIs |
| 0.1.3 | 2026-08-15 | add a demo video and improve the documentation |
| 0.1.2 | 2026-08-15 | manage Syncthing folders from the bar panel |
| 0.1.1 | 2026-08-14 | monitor installs and show live synchronization activity |
| 0.1.0 | 2026-08-12 | first release |
Upgrade
Update through Omarchy, then restart the shell to load the updated plugin:
omarchy plugin update io.github.ilyazar.syncthing
omarchy-restart-shell
Restart the shell after updating; the retained old service may otherwise fail. Syncshell does not restart it automatically.
Remove
Select Cleanly remove Syncthing plugin in settings. You can keep or delete plugin settings. When Syncthing is reachable, both choices restore its default UI and remove the custom Web UI profiles. Otherwise those profiles are retained so removal never guesses their location. Syncthing itself, its configuration and synced files remain intact.
To uninstall Syncthing separately:
systemctl --user disable --now syncthing.service
omarchy pkg drop syncthing
These commands leave Syncthing configuration and synchronized files intact.
Security and license
The plugin runs as unsandboxed code under your desktop user. The Go core keeps the Syncthing API key out of QML and plugin settings; that key permits changes to Syncthing's configuration. File actions use your existing permissions.
Plugin code is MIT licensed. The Web UI and adapted icons retain Syncthing's MPL-2.0 attribution and vendor licenses; see Web UI provenance and icon sources. The Go runtime and system-call dependency use the BSD license.