
Tapo Cameras — Omarchy Plugin
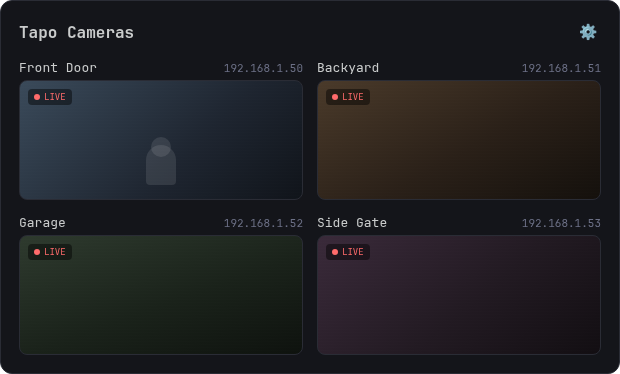
An Omarchy plugin that adds a bar icon for quickly
viewing your TP-Link Tapo cameras. Click the icon to see a live preview of
each camera; click a preview to open its full RTSP stream in mpv, tiled
into your workspace.
This is a bar-widget plugin: a single QML entry point (Panel.qml) that
renders both the bar icon and its floating popup, with two views — the
camera list, and a settings screen (the cog icon) for adding, editing,
hiding, removing, and testing cameras without ever hand-editing a config
file.
Requirements
- Omarchy with plugin support (
omarchy plugincommands) - Qt Multimedia with the FFmpeg backend (
qt6-multimediaon Arch), used for the live preview mpv,ffprobe, andffmpegitself (all three ship together) — mpv plays the full stream on click, ffprobe powers the settings screen's "Test" button and the offline- notification check, ffmpeg grabs the cached thumbnail frames (see below)curlandopenssl(both near-universal on Arch already) — used by the bundledonvif-ptz.shfor pan/tilt control; the pan/tilt arrows on thempvstream view also need mpv's bundled Lua scripting support, which the mainline Archmpvpackage already has built in- Tapo cameras with RTSP enabled and a camera account configured (see below) — most plugged-in Tapo cameras (C1xx/C2xx/C3xx series) support this; battery-powered doorbells and battery cameras generally don't, since they stream through TP-Link's cloud only and have no local RTSP option
Install
omarchy plugin install https://github.com/ZestyBytes/omarchy-plugin-tapo
Or manually:
git clone https://github.com/ZestyBytes/omarchy-plugin-tapo \
  ~/.config/omarchy/plugins/io.github.zestybytes.tapo-cameras
omarchy plugin enable io.github.zestybytes.tapo-cameras
Uninstall
omarchy plugin remove io.github.zestybytes.tapo-cameras
This removes the plugin itself; your camera list at
~/.local/state/omarchy/tapo-cameras/cameras.json is left in place
(delete it separately if you want it gone too — it holds your camera
credentials, see below).
Set up your cameras
Everything happens from the bar — no config file editing required:
- Click the camera icon in the bar.
- Click the cog icon (top right of the panel) to open Camera Settings.
- Click + Add camera and fill in:
- Name — whatever you want it labeled as
- IP address and port (554 by default) — the camera's local network IP; check your router's connected-devices list or the Tapo app's device info screen
- Username / password — a camera account, created in the Tapo app: open the camera → gear icon → Advanced Settings → Camera Account. This is a separate login from your TP-Link cloud account, created specifically for local RTSP/ONVIF access.
- Stream —
stream1(HD) orstream2(SD, lower bandwidth); this is what opens full-size inmpvwhen you click a preview - Preview — the (usually lower-res) stream decoded for the live
thumbnail grid, defaulting to
stream2. Keeping this separate from Stream means several tiled previews don't mean several HD feeds being decoded at once — set both tostream1if you want full quality in the grid and have the bandwidth/CPU to spare
- Click Test to confirm it connects.
- Click the back arrow — your camera now shows a live preview in the panel.
The eye icon toggles a camera hidden from the main view without deleting it; the trash icon removes it entirely.
Config file (optional, for bulk setup or scripting)
Settings are stored at ~/.local/state/omarchy/tapo-cameras/cameras.json
(see cameras.json.example for the shape). This lives outside the plugin's
own directory deliberately — Omarchy hot-reloads a plugin whenever a file
under its plugin directory changes, so keeping per-user config there caused
the whole widget to reload on every save.
- This file holds camera credentials in plaintext. The plugin creates
its containing state directory with
700permissions and reapplies that mode on startup, so other local users cannot traverse the directory to read it. Keep the directory private, since anyone with read access to the file gets RTSP access to your cameras. - Hand-edits aren't picked up live — they're read the next time you open the panel.
How it works
Panel.qml— the whole plugin: bar icon, the camera-list popup (live video via Qt Multimedia, click to open the full stream inmpv), and the settings popup (add/edit/hide/remove/reorder/test, all reading and writingcameras.json).CameraModel.js— parses/serializescameras.jsonand builds thertsp://user:pass@ip:port/streamNURL for each camera.onvif-ptz.sh— a small curl/openssl ONVIF SOAP client for pan/tilt.onvif-ptz-osc.lua— an mpv script drawing the pan/tilt arrows on the tiled stream view; see below.
2+ cameras tile into a grid (1 camera fills the width); drag a settings row's grip handle to reorder the list.
Pan/tilt — clicking a preview opens its full stream in mpv (as
always); for cameras with the "Pan/tilt" checkbox on, that mpv instance
also loads onvif-ptz-osc.lua, which draws four small arrow buttons in the
bottom-right corner of the video and calls onvif-ptz.sh's
ContinuousMove/Stop (over the camera's local ONVIF port 2020, same
camera-account credentials as RTSP) on press/release. This used to be a
hover-arrows overlay on the small grid preview instead, but sitting on top
of that live, already-bandwidth-constrained VideoOutput made it flicker,
so it was moved here. Doing it as an mpv script — running inside mpv's own
render/input loop — rather than a separate overlay window kept in sync via
window-position polling was a deliberate choice for the same reason: no
window-sync lag to flicker in the first place. Untick the checkbox for
cameras without a physical pan/tilt mount, which will otherwise just ignore
the ONVIF commands harmlessly.
Delete confirmation — the trash icon in settings needs two clicks: the first arms it ("Confirm?", with a few seconds to change your mind), the second actually removes the camera.
Offline notifications — runs in the background regardless of whether the panel is open. Every 60s, each visible camera's RTSP stream is checked; a desktop notification fires only on an actual state change (went offline, or came back online) — never repeatedly for a camera that's simply always unreachable, and never on the first check of a session.
Thumbnail cache — that same 60s background check also grabs a still
frame from each online camera (ffmpeg, one JPEG frame) and caches it at
~/.cache/omarchy/tapo-cameras/thumbnails/. The grid preview shows this
cached frame as a backdrop while its live stream is (re)connecting, instead
of a flash of plain black — including right when the panel is first
opened, since the cache is already warm from the background poller by
then, panel open or not.
Roadmap / ideas
ONVIF (WS-Discovery) camera auto-discovery— tried and dropped: tested a standard WS-Discovery multicast probe against real Tapo hardware and got zero replies, even though the cameras' ONVIF SOAP port (2020, whatonvif-ptz.shtalks to) is reachable directly. Consistent with the motion-detection finding below — Tapo implements just enough ONVIF to serve profile/PTZ calls once you already know the IP, not the discovery beacon. They use TP-Link's own separate proprietary protocol for the Tapo app's own "find nearby cameras" feature, which this doesn't attempt. IPs stay something you type in by hand.- Motion-detection notifications — investigated for this release; Tapo's ONVIF event (pull-point) service proved too unreliable on real hardware to build on (the camera's embedded web server degrades under repeated polling), so this is on hold pending a more robust approach
License
MIT